
| Getting your Trinity Audio player ready... |
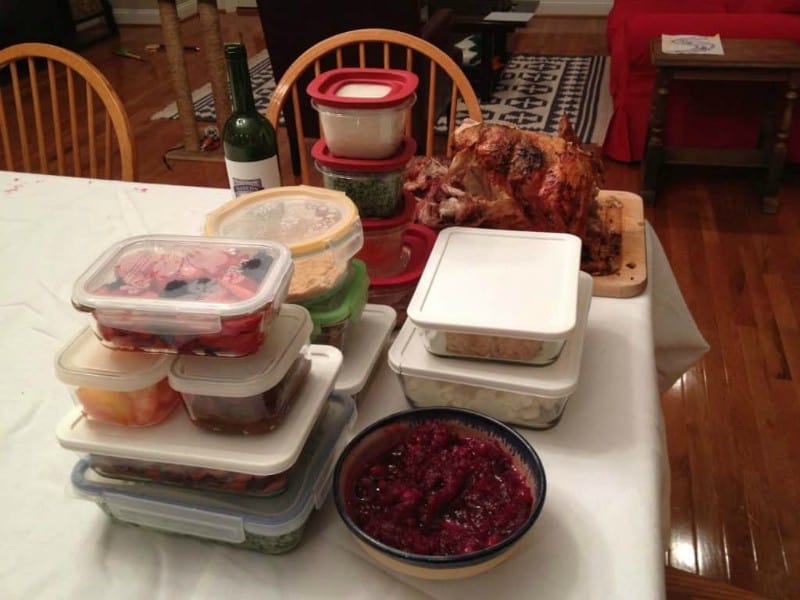
It’s the night of the big holiday meal. Everyone has eaten, the kitchen is a disaster, and there’s still a counter full of food waiting to be put away.
You open the container cabinet. A lid slides out and hits the floor. Three containers have no lids, and two lids fit nothing. The big container you need for the main dish is at the back, under everything else.
As a professional organizer in Houston, I’d call this the easiest holiday problem to fix ahead of time, and it matters for two reasons.
The first is food safety. The U.S. Department of Agriculture says to refrigerate leftovers within two hours of cooking, or of taking them out of a warming appliance. If it’s above 90°F, make it one hour. That clock keeps running while you hunt for a lid.
The second is the food itself. Leftovers that go into the wrong container, or get lost at the back of the fridge, are the ones that get thrown out on day five after being forgotten about.
An hour spent on the cabinet before the meal means you can enjoy the evening and still put everything away properly. Here’s how to do it.
Step One: Empty the Cabinet and Match the Lids
Yes, all of it. Take every container, lid, and bag out and put them on the table. Then match each container to its lid, and put the pairs together.
Whatever is left over is the problem.
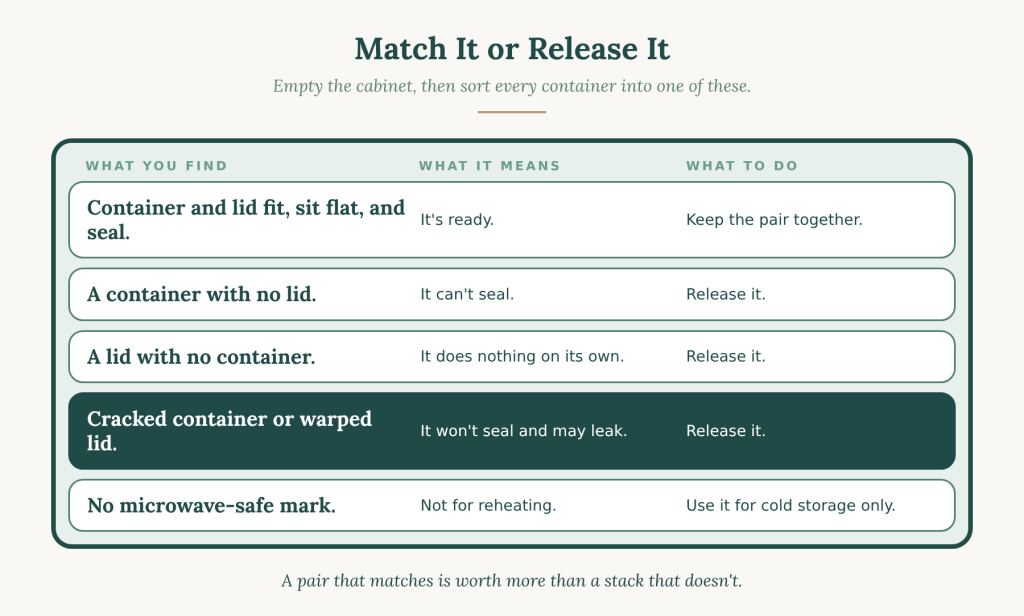
A lid with no container, or a container with no lid, does nothing for you. Most cabinets are full of both, and they’re the main reason nothing stacks and the door won’t close.
Step Two: Check What’s Left
Look at each matched pair for three things:
- Cracks or warping: a cracked container or a lid that no longer sits flat won’t seal, and it will leak in the fridge.
- A snug fit: press the lid on and tip the container gently. If the lid pops off, it isn’t ready for gravy.
- A microwave-safe mark: you’ll reheat a lot of this food. The USDA advises a microwave-safe covering, so check the bottom of each container for the mark.
Keep the ones that pass. The rest can go, and the cabinet is already easier to use.
Step Three: Plan What You’ll Need
Write down your menu, one line for each dish. Plan one container for each, plus a few extra for the plates guests will take home.
Size matters too. The USDA advises dividing large amounts of food into shallow containers so they cool quickly. For a roast, a casserole, or a big pot of rice, shallow is better than deep.
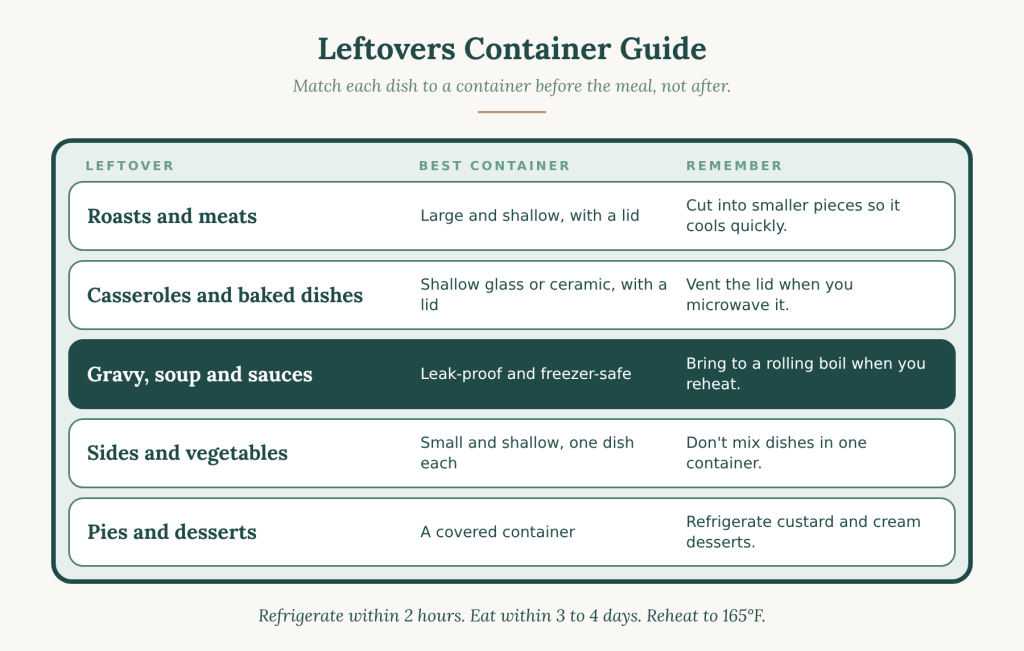
Now count what you have in each size, and compare it with your list. You’ll see right away if you’re short of large, shallow containers or leak-proof ones for gravy, and you can buy only what fills the gap.
Step Four: Give Pairs a Home
Containers and lids that live together stay together. Here are a few ways to do it:
- Store each container with its lid on, nested by size.
- Or stand the lids upright in a bin or a vertical file organizer, so you can see them all at once.
- Put the set you’ll use for the holiday on a shelf at eye level, and move everything else out of the way.
Then clear the other half of the problem, the fridge. You’ll want a shelf or two open the night before. I covered that in [how to organize your fridge before holiday cooking]([fridge post link]), and the table and dishes in how to organize your serving dishes and table before a holiday meal.
Step Five: Set Up a Leftovers Station
Before the meal, clear a stretch of counter and set out:
- The containers and lids you chose, already matched
- A roll of masking tape and a marker
- A stack of disposable containers, or reusable ones you won’t miss, for guests’ plates
- A trash bag, a serving spoon, and a food thermometer
When dinner ends, you won’t be hunting for anything. You pack the food, label it, and put it away while it’s still inside that two-hour window.
Step Six: Pack It, Label It, Plan the Week
Slice or cut large roasts and other meats into smaller pieces, and give each dish its own shallow container. Write the date on a strip of tape and stick it on the lid.
Leftovers keep in the fridge for three to four days, according to the USDA. Anything you won’t eat by then should go in the freezer, where leftovers keep their best quality for three to four months.
When you reheat, bring the food to 165°F, checked with a food thermometer. Gravy, soup, and sauces should come to a rolling boil.
The Shopping List
Look at what you have first, then buy only what fills a gap. Here’s what I’d look for:
- Large shallow containers with lids, for roasts and casseroles
- Glass containers with snap-on lids that go from fridge to microwave
- Leak-proof containers for gravy and soup
- Freezer-safe containers
- A lid organizer, or a vertical file organizer
- Disposable containers, for guests’ plates
- Masking tape and a marker
- A food thermometer
After the Holidays
When the leftovers are gone, wash everything and put each container back with its lid. This setup isn’t only for the holidays. A cabinet where everything has a pair makes packing a lunch or storing a weeknight dinner easy too.
If this one cabinet looks familiar, the rest of your kitchen probably does too. The pantry, the counters, and the fridge tend to go wrong in the same way, and that’s a bigger job than one afternoon before a holiday.
That’s where I can help. As a decluttering expert and professional organizer, I work with clients in person across the Greater Houston area and virtually from anywhere. I help you decide what stays, then set the kitchen up so it stays that way.
Not sure where to start? My Virtual Home Audit is a live video call where we look at your kitchen together, and I tell you what to fix first.
Ready for hands-on help? Book a session here or call 832-271-7608. If you have questions first, fill out the form below and I’ll answer them as quickly as I can.

Working with Taya and her team is easy. You can book an appointment easily on her website, or contact her directly at 832-271-7608
- How to Organize Holiday Gifts During Black Friday Sales - November 16, 2026
- How to Fake a Pantry in Any Kitchen Before the Holidays - November 13, 2026
- How to Organize Food Storage Containers Before Holiday Leftovers - November 11, 2026