
| Getting your Trinity Audio player ready... |
Hey friend,
Holiday baking has a way of exposing your kitchen. You pull out what you need for one recipe and find three half-used bags of brown sugar fused into a brick, a tin of baking powder from two apartments ago, and no vanilla at all. Then you’re standing in the store buying a second bag of flour you already own.
If that sounds familiar, it’s completely normal. Baking supplies get used in bursts, sometimes only a few times a year, so they’re easy to lose track of between seasons. The good news is that it takes one afternoon to fix, and the best time to do it is before the seasonal baking starts.
Here’s how to set up your baking supplies so you can find everything, and so everything you find is still good.
Step One: Take Everything Out and Check What’s Still Good
Pull every baking item onto the counter so you can see it all at once. Then go through it with a quick freshness check.
Baking powder and baking soda lose their strength over time. To test baking powder, stir a spoonful into hot water. If it fizzes, it’s fine. To test baking soda, drop a spoonful into a little vinegar, and it should bubble right away. Check the date on your yeast. Smell your flour, especially whole wheat and nut flours, which go rancid sooner than all-purpose and keep better in the fridge or freezer. Ground spices fade with time, so if you open a jar and can barely smell it, it won’t add much to your recipe.
Throw out anything expired, stale, or clumped past rescue. If you have two open bags of the same ingredient, combine them into one container. Hardened brown sugar can be softened, but if there’s more than a cup of it, it’s usually easier to start fresh.
Step Two: Decide Where Baking Lives
Pick one place for everything baking-related, ideally near where you prep and close to your mixer. One cabinet or two shelves is plenty. When flour is in the pantry, sprinkles are in the garage, and the extracts are in a drawer, you spend more time hunting than baking.
Step Three: Set It Up in Zones
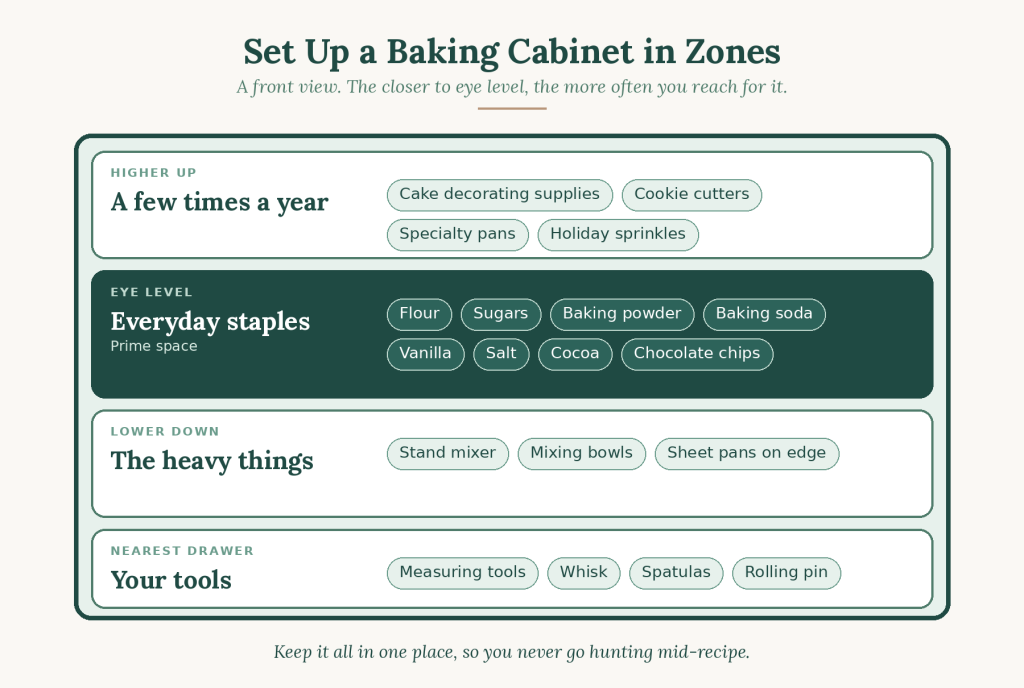
Arrange the space by how often you reach for things.
Eye level is for the staples: flour, sugars, baking powder and soda, vanilla, salt, cocoa, and chocolate chips.
Higher up is for what you use a few times a year: cake decorating supplies, cookie cutters, specialty pans, and holiday sprinkles.
Lower down is for the heavy items: the stand mixer, mixing bowls, and sheet pans. Store sheet pans and cutting boards on their edge in a vertical organizer so you can slide one out without moving the whole stack.
Keep measuring cups and spoons, whisks, spatulas, and the rolling pin in the nearest drawer, so you’re not walking across the kitchen mid-recipe.
Step Four: Switch to Containers That Keep Things Fresh
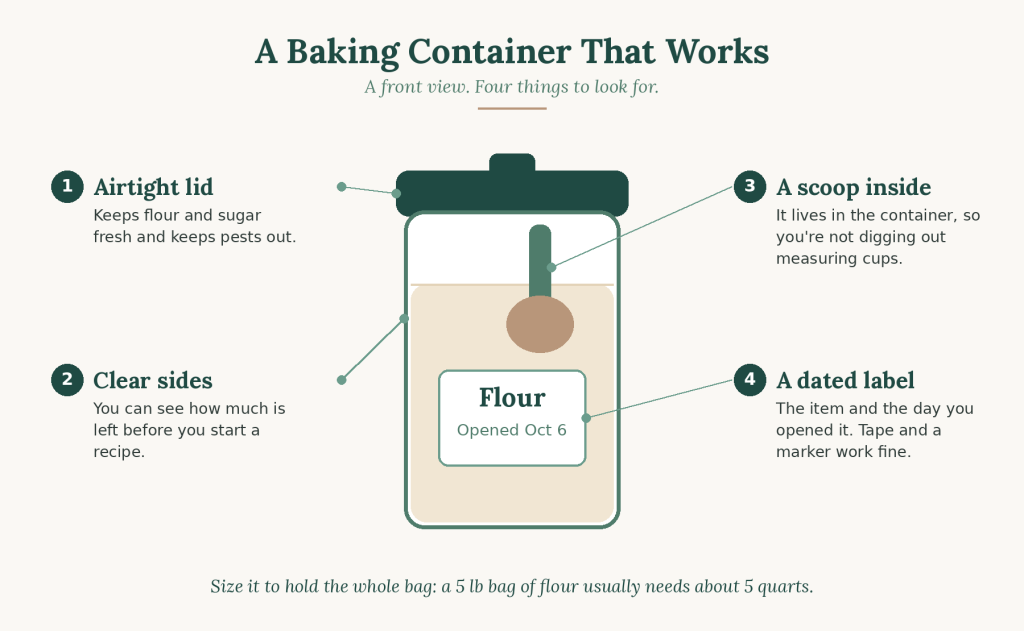
Transfer flour and sugar into airtight containers with a scoop inside. Size them to hold a full bag, because a five-pound bag of flour usually needs about a five-quart container. Clear containers let you see how much is left before you start a recipe and find out you’re short.
Label each one with the item and the date you opened it, using a label or a strip of tape and a marker. Group the small things in clear bins by category, such as chocolate, sprinkles and decorations, and extracts and food coloring. A turntable on a shelf makes small bottles easy to reach, so nothing hides in the back.
For the spices you use in baking, our spice cabinet tips will help you keep them findable, and if the rest of your pantry needs attention, there’s a pantry reset here.
Step Five: Take a Pre-Season Inventory
Once everything is in place, you can see what you have. Write down what you need for your top three holiday recipes, and compare. Take a photo of the shelves with your phone, so you’re not guessing in the store about whether you already own cinnamon. A list taped to the inside of the cabinet door works too.
Step Six: Keep It Going
After each bake, return what you used and wipe down the shelf. Reset before you rest, and the next time you bake, you’ll start from a clean, stocked cabinet. When the season ends, do a short check in January to use up or toss what’s left.
The Shopping List
Measure your shelves first, then buy. Here’s what I’d look for:
- A large airtight container for flour, about five quarts
- Smaller airtight containers for sugars and cocoa
- A set of clear stackable bins for small items
- A turntable for extracts and food coloring
- A vertical organizer for sheet pans and cutting boards
- A drawer organizer for baking tools
- Labels and a marker
If your kitchen in Houston turns into a scramble every time the holidays arrive, that’s exactly the kind of project I help clients tackle: sorting what’s worth keeping, finding it a home, and setting up a kitchen that works when you’re busiest. As a decluttering expert and professional organizer I work with clients in person across the Greater Houston area and virtually from anywhere. Book a session here, call 832-271-7608 to get started even faster, or, if you still have questions, complete the form below. I’ll answer them as quickly and completely as possible.

Working with Taya and her team is easy. You can book an appointment easily on her website, or contact her directly at 832-271-7608
- How to Organize Your Baking Supplies Before the Holiday Baking Starts - October 9, 2026
- How to Organize a Nightstand: What Goes on Top, in the Drawer, and Behind It - October 7, 2026
- What Not to Store in a Houston Garage or Attic (and Where It Should Go Instead) - October 5, 2026