
+ The Surprising Connection Between Clutter and Stress Revealed

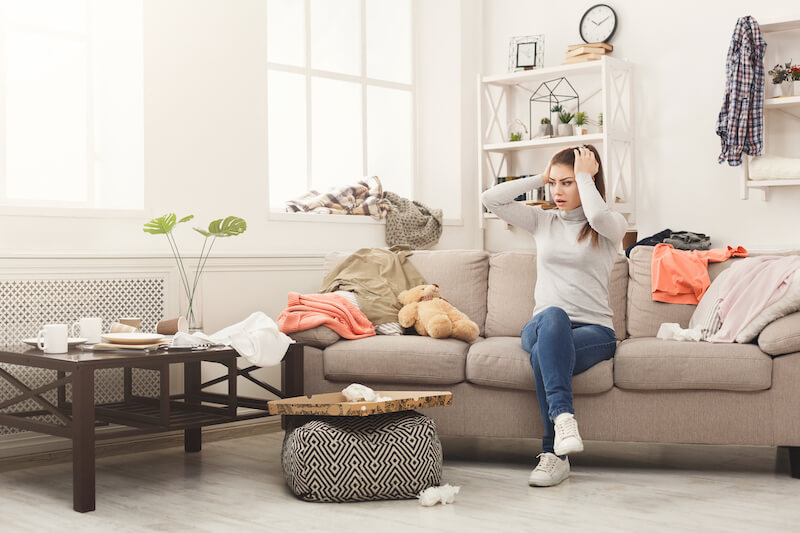
Have you ever walked into a room filled with clutter and felt a sudden sense of overwhelm? You’re not alone. Clutter can cause stress, and numerous studies back up this connection.
In this blog post, we’ll dive deep into the science behind clutter-induced stress and provide you with simple, manageable decluttering projects that will help you lead a more relaxed and organized life. And, if you need a little extra help, don’t hesitate to reach out to Just Organized by Taya for expert assistance in transforming your space.
The Science Behind Clutter and Stress
Clutter, simply put, is an excess of items in a disorganized space. This seemingly harmless mess can create a sense of chaos, making it difficult for our brains to process information effectively. In fact, research has shown that clutter can directly impact our mental well-being.
A study conducted by UCLA’s Center on Everyday Lives of Families (CELF) found that a cluttered home environment led to increased levels of stress, particularly for women. The researchers observed that women who lived in cluttered homes had higher levels of the stress hormone cortisol than those who lived in more organized spaces.
Another study published in the journal Environment and Behavior found that people who described their homes as “cluttered” or “unfinished” were more likely to experience feelings of fatigue, depression, and stress. These feelings of overwhelm and exhaustion can make it even more difficult to tackle the clutter, creating a vicious cycle that’s tough to break.
Small Decluttering Projects to Get Started
The good news is that you can break this cycle and reduce stress by tackling small decluttering projects. Here are a few ideas to help you get started:
Junk Drawer Makeover
Junk Drawer Makeover
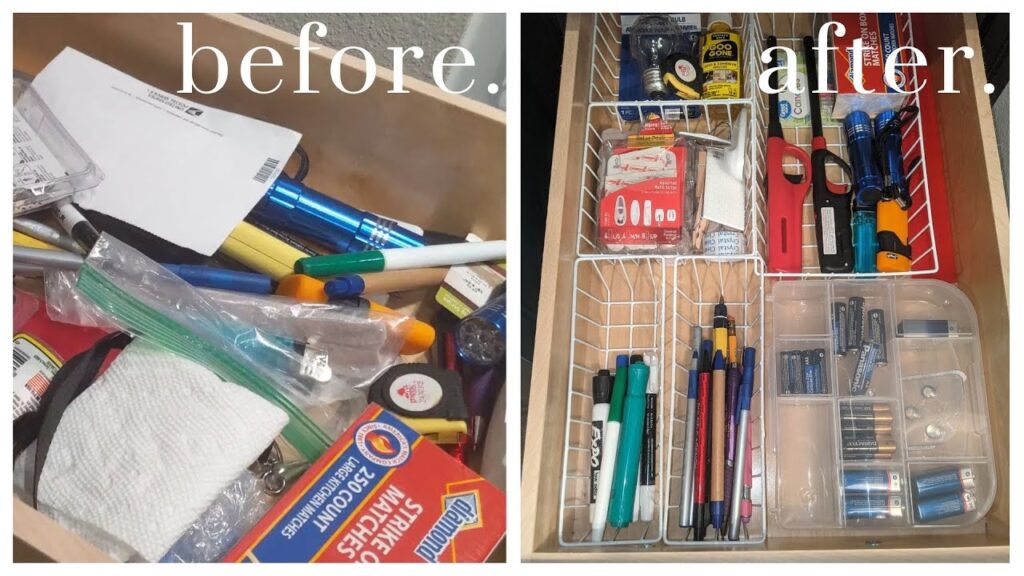
Ah, the notorious junk drawer – home to a motley collection of odds and ends that somehow don’t belong anywhere else. But it’s time to turn this chaotic catch-all into a well-organized nook. First things first, set aside some time for this task. Maybe it’s a lazy Sunday afternoon or an evening after work when you’re looking for a productive distraction. Put on your favorite tunes or a podcast to make the process enjoyable.
Step-by-Step Approach:
- Empty and Clean: Start by emptying the drawer onto a table or countertop. This is also a perfect opportunity to give the drawer a good wipe-down. A clean slate makes a huge difference.
- Categorize and Decide: As you look at the items sprawled out, start sorting them into categories like office supplies, tools, batteries, or random knick-knacks. This visual representation of what you’ve been storing will help you make more logical decisions about what should stay and what should go.
- Be Ruthless in Decluttering: Be honest with yourself—when was the last time you used that lone rubber band or those expired coupons? If an item is broken, outdated, or hasn’t been used in over a year, it’s time to toss it. This step is crucial in ensuring that you don’t end up with another cluttered drawer in a few months.
- Organize Thoughtfully: Once you’ve narrowed down to the essentials, organize them back into the drawer. This is where drawer dividers or small containers come in handy. They keep items separated and easy to find. Consider using repurposed items like small cardboard boxes or egg cartons for an eco-friendly organizing solution.
- Label if Necessary: For an extra layer of organization, label the compartments or containers. This not only helps you find things quickly but also ensures that items are returned to their rightful spot after use.
- Maintain the Order: Finally, make it a habit to periodically check the drawer. A quick monthly review can help maintain the order you’ve established and prevent the junk drawer from returning to its former chaotic state.
Wardrobe Refresh

Wardrobe Refresh: Decluttering and Organizing Your Closet
Revamping your wardrobe is not just about making more room; it’s about rediscovering and redefining your style. So, let’s turn this into a fun and productive session. Set aside a few hours on a day when you’re feeling motivated, slip into your comfiest sweats, and get ready for a closet makeover. Turn on some upbeat music or your favorite podcast to keep your spirits high during the process.
Step-by-Step Guide:
- The Great Unveiling: Start by pulling out all your clothes and laying them out where you can see everything. Use your bed, a clean floor space, or a hanging rack as your staging area.
- The Fit, Feel, and Frequency Check: Now comes the crucial part. Pick up each item and ask yourself:
- Does it fit well, or do you keep it hoping one day it will?
- Does it feel good on, or is it itchy, tight, or otherwise uncomfortable?
- Have you worn it in the past year? If not, it’s likely you won’t in the year ahead.
- Create Three Piles: Based on your answers, sort your clothes into three categories:
- Keep: Items that fit well, feel good, and have been worn recently.
- Donate: Clothes in good condition that don’t fit or haven’t been worn.
- Discard: Items that are too worn, damaged, or out of shape to be donated.
- Organization by Category: Once you’ve trimmed down your wardrobe, organize the remaining items back into your closet. You can sort them by type (e.g., shirts, pants, dresses), color (create a visually pleasing gradient), or season (keep the current season’s clothes most accessible).
- Invest in Good Hangers: Switch to high-quality hangers that are gentle on your clothes and consistent in style – this alone can transform the look of your closet.
- Extra Tips for Organization:
- If you’re short on space, consider seasonal rotation, where out-of-season clothes are stored away.
- For smaller items like socks and underwear, drawer organizers can be a game-changer.
- Use clear boxes or labels for items that need to be stored on higher shelves.
Additional Considerations:
- Emotional Attachments: It’s normal to have emotional attachments to certain garments. If you struggle to part with an item due to sentimental value, consider keeping a ‘memory box’ where you can store these special pieces away from your everyday wardrobe.
- Sustainability: When discarding clothes, think about environmentally friendly options like textile recycling or repurposing them as cleaning cloths.
- Regular Reviews: Make it a habit to review your wardrobe every season. This will keep your closet manageable and ensure it always aligns with your current needs and style.
The Joy of an Organized Closet:
Once you’ve completed these steps, take a moment to appreciate your work. A well-organized closet not only looks great but also makes choosing outfits less stressful and more enjoyable. With everything in its place, you can easily see all your clothing options, making getting ready each day a smooth and pleasant experience. Plus, this exercise often reignites a love for forgotten pieces, giving your style a fresh breath of life.
Pantry Power-Up

Pantry Perfection: A Step-by-Step Guide to an Organized Kitchen Haven
Creating an organized pantry is not just about tidiness; it’s about efficiency and reducing daily stress when it comes to meal preparation. Ready to give your pantry the makeover it deserves? Block out a few hours, maybe on a weekend morning, arm yourself with a healthy snack for energy, and let’s get started. This process is not only practical but can also be incredibly satisfying.
Step-by-Step Process:
- The Big Pantry Clear-Out: Begin by emptying everything out of your pantry. Use your kitchen counter or table as a staging area to lay out all items. This gives you a clear view of what you have, what you use, and what’s just taking up space.
- Expiration Date Audit: One by one, check the expiration dates on all your items. Be realistic and discard anything that’s expired or that you know deep down you’ll never use. This decluttering step is crucial for making space for the items you genuinely need and use.
- Cleaning Time: With your pantry cleared out, it’s the perfect opportunity to give those shelves a thorough clean. A quick wipe down will do – you might be surprised at how much dust and crumbs accumulate in these spaces.
- Strategic Grouping: Once you’ve narrowed down your pantry items, start grouping them by category. This could be canned goods, baking supplies, snacks, pastas and grains, etc. Grouping like items together will make finding what you need a breeze and will help keep your pantry organized in the long run.
- The Magic of Clear Containers: For bulk items or small packages, clear containers or bins are a game-changer. They not only make your pantry look neat and uniform but also allow you to see exactly what you have at a glance. This is especially handy for baking supplies like flour and sugar, or for snacks like nuts and dried fruit.
- Label Everything: Labels are your best friends in pantry organization. They help everyone in the household know where things go, making it easier to maintain the order you’ve created. You can use a label maker, write on the containers with a marker, or even get creative with chalkboard labels for a rustic touch.
Additional Tips for Pantry Organization:
- Utilize Door Space: If your pantry has a door, consider using over-the-door racks or hanging organizers for extra storage.
- Adjustable Shelving: If possible, adjust your shelves to fit the height of your items. This maximizes space and creates a custom fit for your pantry items.
- Remember Visibility and Accessibility: Place items you use most frequently at eye level and within easy reach. Store less frequently used items on higher or lower shelves.
- Keep It Fresh: Invest in some freshness extenders, like moisture absorbers or herb keepers, to prolong the life of your produce and herbs.
The Result:
With your pantry now organized, meal prep and cooking will become more efficient and less stressful. You’ll save time knowing exactly where everything is and reduce food waste by being more aware of your available ingredients. Plus, there’s a certain joy in opening your pantry doors to see a beautifully organized space.
Digital Detox

Taming the Digital Chaos: A Guide to Decluttering Your Online Life
In today’s digital age, virtual clutter can be just as overwhelming as physical clutter. But fear not! With some dedicated time and a systematic approach, you can bring order to your digital world. Set aside a specific day or allocate a few hours each week to embark on this digital decluttering journey. This commitment can transform your online experience from stressful to streamlined.
Step-by-Step Digital Decluttering:
- Email Overhaul:
- Unsubscribe and Declutter: Begin with your inbox. Unsubscribe from newsletters and mailing lists that no longer interest you. This reduces future influx and makes your email more manageable.
- Delete or Archive: Go through your messages, deleting anything unnecessary and archiving those you need to keep. Be decisive to prevent clutter from accumulating again.
- Create Folders: Establish folders or labels for various categories like ‘Personal,’ ‘Work,’ ‘Bills,’ and ‘Family.’ This helps in efficiently categorizing incoming emails and makes finding old emails much easier.
- File Management:
- Categorize: On your computer, start organizing your files, photos, and documents. Create a logical folder structure that mirrors how you think about these items. For instance, ‘Photos – 2021’, ‘Work Projects’, ‘Financial Documents’, etc.
- Eliminate Duplicates: Use a duplicate file finder tool to remove redundant files. These not only take up space but also create confusion.
- Regular Clean-up: Make it a habit to regularly go through your files and delete anything that’s no longer relevant.
- Cloud Storage and External Drives:
- Backup Regularly: Use cloud storage services like Google Drive, Dropbox, or iCloud for backing up important files. This not only frees up space on your device but also keeps your data safe.
- External Hard Drives: For very large files or sensitive documents, consider using an external hard drive. This is especially useful for large media files, like videos or high-resolution photos.
- Digital Photo Organization:
- Sort and Label: Organize your photos into folders by year, event, or location. This makes it easier to find specific photos when you need them.
- Cloud Albums: Utilize features in cloud storage services to create shared albums, making it easy to share memories with friends and family.
- Managing Digital Subscriptions and Apps:
- App Audit: Go through your devices and delete any apps you no longer use. This frees up space and reduces visual clutter.
- Subscription Review: Keep track of your digital subscriptions and memberships. Cancel any that you no longer use or find valuable.
Additional Digital Decluttering Tips:
- Social Media Sanity: Unfollow or mute accounts that don’t add value to your life. This makes your social media experience more positive and less overwhelming.
- Update Your Security: Regularly update your passwords and review your privacy settings to keep your digital presence secure.
- Digital Detox: Consider setting aside time each day or week when you disconnect from digital devices. This can help reduce stress and improve focus.
Bathroom Bliss

Bathroom Bliss: Creating Your Own Spa-Like Retreat
The bathroom is more than just a functional space – it can be your personal sanctuary, a place to unwind and rejuvenate. A cluttered and disorganized bathroom, however, can have the opposite effect. Taking the time to declutter and organize can transform your bathroom into a relaxing oasis. Here’s a step-by-step guide to achieving a serene and orderly bathroom.
Step-by-Step Process:
- The Great Clear-Out:
- Decluttering Essentials: Begin by emptying your cabinets, drawers, and countertops. Sort through your toiletries, makeup, and medications. Discard anything that’s expired, unused, or no longer needed. This step not only declutters your space but also ensures your health and safety by removing expired items.
- Mindful Disposal: Be mindful of how you dispose of certain items, especially medications. Look for local take-back programs or proper disposal methods for such items.
- Deep Clean and Freshen Up:
- Surface Cleaning: With your bathroom cleared out, take this opportunity to give all surfaces a thorough wipe down. This includes shelves, drawers, and countertops. A clean space is not only more visually appealing but also more hygienic.
- Refresh Your Space: Consider adding a fresh coat of paint, changing out old shower curtains, or updating cabinet handles for an instant refresh.
- Smart Organization:
- Utilize Organizers: Invest in organizers or containers to group similar items together. This could be drawer dividers for makeup, baskets for hair products, or clear containers for skincare products. The goal is to make everything easily visible and accessible.
- Vertical Storage Solutions: To maximize space, especially in smaller bathrooms, look to your walls. Install shelves or hanging organizers for additional storage. These can hold extra towels, toiletries, or decorative items like plants and candles.
- Functional Layout:
- Accessibility is Key: As you return items to your bathroom, think about your daily routine. Place frequently used items within easy reach. For example, everyday skincare products can be stored on a countertop organizer, while less frequently used items can be stored higher up or in deeper cabinets.
- Creating Zones: Consider creating different zones in your bathroom. For instance, one area for makeup and skincare, another for hair care tools and products, and a separate space for medicines and first aid.
- Final Touches:
- Add Relaxing Elements: Introduce elements that enhance relaxation – think scented candles, a plush bathmat, or a small potted plant. These little touches can elevate the overall ambiance of your bathroom.
- Maintain Order: Set a regular schedule to review and tidy up your bathroom. This will help maintain the serene and organized environment you’ve created.
Transforming Your Bathroom:
By following these steps, your bathroom will no longer just be a functional space – it will become a calming retreat where you can de-stress and pamper yourself. An organized and aesthetically pleasing bathroom not only simplifies your daily routine but also contributes to your overall well-being.
Get Expert Help from Just Organized by Taya
While these small decluttering projects can help you get started on the path to a more organized and stress-free life, tackling larger projects can be daunting. That’s where Just Organized by Taya comes in.
Our team of professional organizers can help you declutter and organize your home or office, creating a serene and functional environment that promotes well-being and reduces stress. Contact us today to discuss just how we can help you!

Working with Taya and her team is easy. You can book an appointment easily on her website, or contact her directly at 832-271-7608
- The Post-Christmas Reset: What to Do (and What to Skip) This Weekend - December 26, 2025
- The Week-Before-Christmas Survival Guide: Last-Minute Gift Organization Tips - December 18, 2025
- 7 Things in Your Kitchen Right Now That Need to Go - December 16, 2025
